
Step-by-Step Guide on How to Build Rain Gardens for Sustainable Water Management
Posted on September 19, 2023 by Jeremiah Sooter
Rain gardens have emerged as a vital component of sustainable water management practices. With increasing concerns about stormwater runoff and the need for eco-friendly landscaping, these gardens have gained popularity as an effective solution. The unique design of these garden landscapes captures and filters rainwater, allowing the water to infiltrate the ground rather than flow into storm drains or cause erosion.
The concept behind these gardens is simple yet powerful. By creating depressions in the landscape and filling them with native plants, soil, and sands, rainwater gets naturally absorbed into the ground. The process helps recharge groundwater levels while reducing the volume and velocity of stormwater runoff.
One of the key benefits of these gardens is the ability to mitigate flooding by managing excess water during heavy rainfall–acting as a natural absorbent process for water and reducing the strain on drainage systems while preventing overflow onto streets and properties.
In addition to their functional role in stormwater management, these gardens offer aesthetic appeal by enhancing landscapes with beautiful native plants. These gardens are helpful in creating wildlife habitats for birds, butterflies, and other animals while creating a visually appealing landscape environment.
As communities strive to adopt sustainable practices for managing water resources, these gardens have become an essential tool in achieving these goals. The eco-friendly nature of rain gardens promotes the following:
- Biodiversity
- Reduces Pollution From Runoff Contaminants
- Conserve Water Resources
- Contributes to Overall Environmental Health
In today’s blog, we explore how to build a rain garden that functions as a sustainable water management solution for residential and business owners. Join us as we discover how to create ecological balance for a community’s well-being.
Step 1: Choosing the Right Location for Your Garden
Choosing a location for your garden is crucial to its success. During site selection, it’s important to consider:
- Soil Type
- Drainage Patterns
- Proximity to Buildings
Soil Type
Firstly, assessing the soil type in the area you’ve chosen to build the garden is essential. Different plants have varying soil requirements, so understanding the composition of the soil will help determine which plants will thrive in that specific location. A soil test will provide invaluable information about the pH level, nutrient content, and drainage capacity.
Drainage Patterns
Next, assess the drainage pattern of your property. You want to build the garden in an area where water naturally accumulates or flows during heavy rainfall events, such as:
- Low Spots or Depressions
- Drainage Spouts
Proximity to Buildings
Lastly, consider the proximity to neighboring buildings when choosing a site for your garden. The idea is to redirect roof runoff or stormwater away from any adjacent buildings.
To control the direction of water, create a gentle slope of a 2% grade in a concave design for optimal water flow. That will prevent erosion or stagnant areas within the garden.
However, it’s okay if stormwater runoff fills the garden because these highly specialized gardens allow water to infiltrate and recharge groundwater slowly.
Step 2: Designing and Planning Your Garden Layout
There are several important factors to consider when designing and planning your garden layout. The shape and size of your garden play a crucial role in its effectiveness and aesthetic appeal.
Firstly, determining the shape and size of your garden is essential. The size will depend on various factors, such as the amount of rainfall received, the size of your property, and the capacity of your garden. Vital to stormwater management, the runoff area in a rain garden should be large enough to catch and absorb the water.
Next, select plants for your garden from a native plant selection guide. The plants you choose should be able to tolerate both wet conditions during heavy rainfall and drier periods between storms.
Choosing a diverse mix of plant species with varying root depths can help maximize your garden’s water absorption and filtration capabilities. Additionally, incorporating a combination of grasses, sedges, wildflowers, shrubs, and trees can create an attractive landscape that is an effective stormwater management solution.
By considering these aspects during the design process, you can create a well-planned garden that not only enhances the beauty of your property but helps mitigate stormwater runoff effectively.
Step 3: Preparing for Installation
Site prep is a crucial step that sets the foundation for a highly functional rain garden. Your first step is to remove any existing vegetation that clears the way for construction activities.
That typically involves clearing trees, shrubs, grasses, and other plants that may obstruct or interfere with the installation process. Doing so creates a blank canvas for the successful execution and installation of your garden.
Grading the area with a 2% slope is another vital aspect of site preparation. It involves leveling and shaping the land to ensure proper drainage and stability.
Grading helps create a smooth and even garden slope, essential for gathering and holding water temporarily while it slowly passes into the groundwater supply. It also helps prevent water accumulation and potential damage to structures in the future.
Step 4: Installing Your Selected Native Plants
Another critical aspect of planting regional plant life in your garden is location and proximity to differing depths of rainwater runoff. For example, wild iris are native to the four states and frequently found along the banks of rivers, lakes, and ponds.
Therefore, if you plant wild irises, grow them along the outer edge of your garden. Plants that can handle significant amounts of rainwater runoff should be planted further toward the garden’s center.
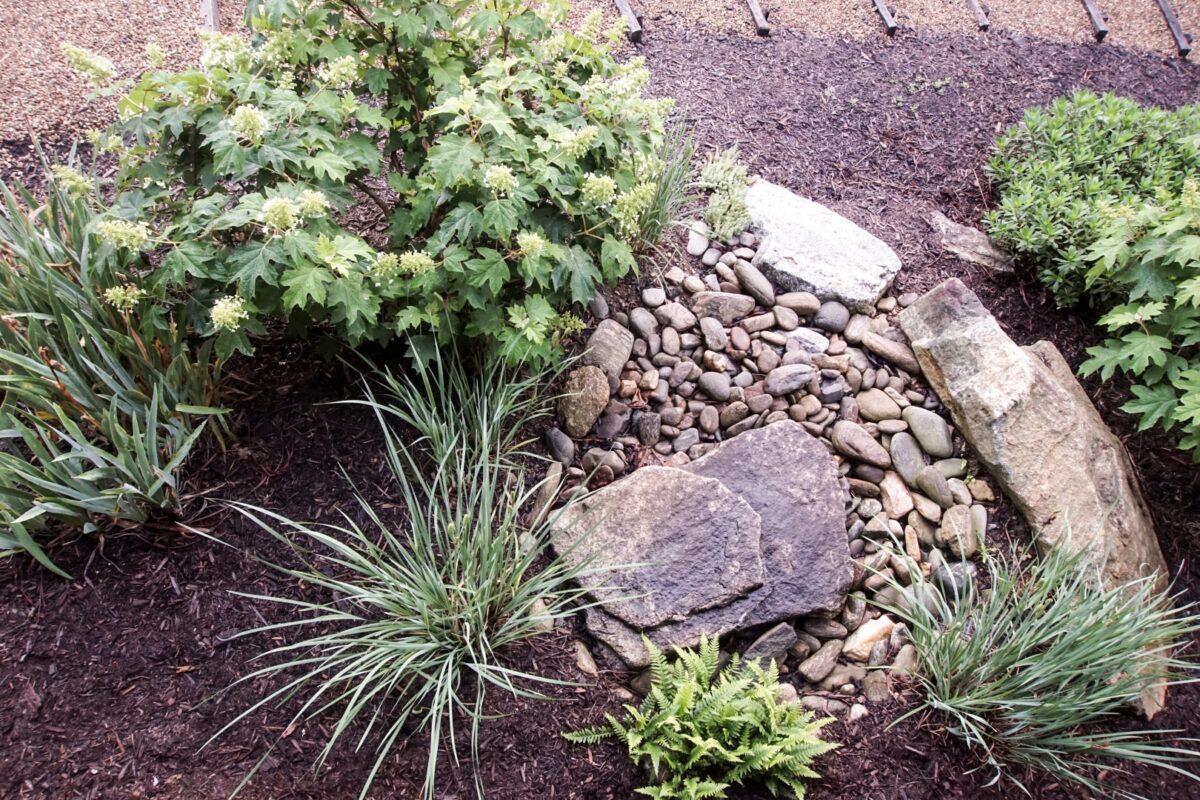
Step 5: Lay Landscaping Fabric, Sand, and Rock
Once you’ve finished planting and smoothed out the grading, lay down a permeable (breathable) landscaping fabric. Afterward, spread a two-inch layer of sand on top of the landscape material. The fabric will slow the growth of weeds, while the sand will keep the fabric in place and filter out any impurities in the stormwater.
Atop the sand, you’ll layer on medium-sized river rock or egg rock, roughly the same size as the palm of your hand. These rocks will act as the first filtration layer that catches large debris before reaching the sand.
Step 6: Maintaining Your Rain Garden for Long-Term Success
Routine maintenance tasks, such as weeding and watering, play a vital role in the health and functionality of your garden. So, maintaining your garden care is crucial for its long-term success.
Weeding is an essential task that helps prevent invasive plants from taking over your garden. Regularly inspect the area and remove any weeds that may have sprouted up through your landscaping fabric.
Watering is another essential aspect of maintaining your garden. While these gardens capture and absorb rainfall naturally, there may be times when additional watering is necessary, especially during dry spells or drought conditions.
Step 7: Hire Landscaping Pros
To ensure your rain garden functions efficiently and effectively, you can hire landscape professionals to assess the runoff terrain on your property. By design, these gardens capture and filter stormwater runoff to reduce pollution and improve water quality, so hiring a professional landscaper will ensure proper grading and leveling for your garden.
The landscaping professionals at Ground Up Services have over fifteen years in:
You can rest assured you’ve hired the best landscaping team in the Four States. To schedule your on-site consultation, contact the team at Ground Up Services today at (417) 439-1009. They also offer lawn care services.